Background:
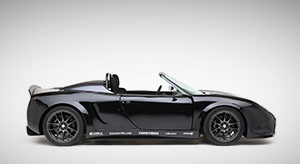
Customers have reported difficulty installing the carbon fiber diffuser on the new Gen 2 GTM. This diffuser is shaped slightly differently than the Gen 1 diffuser and mounts lower. This is a direct result of wind tunneling testing that improved downforce AND improved cooling. The new Gen 2 diffuser also is made to fit with the new Mendeola transmission. Please note, the Gen 1 diffuser can be used on a Gen 2 body, however, it will not fit with the Mendeola transmission.
Tools: Drill, 3/16”, 5/16” drill bit, rivet tool, clamps, measuring tape, marker.
Hardware: Secondary body fasteners, Rear Diffuser.
Raise the diffuser up to the chassis with a jack for fitment so that the diffuser is sitting against the frame but can still be moved around. The upward bend in the diffuser starts just behind the ends of the chassis tubes.

The most important visible alignment of this panel is the rear edge that sticks out past the body. Measure and make sure this edge is even (~1.25”) all of the way across.

Measure the height from the body down to the diffuser. 3.75” is the length of the spacer provided but if a different look is desired these could be cut.

Double check the in/out measurement again then put a little more pressure on the jack to hold the panel firmly in place.
Clamp the sides of the diffuser near the bottom to hold it at the correct angle.
Trace the frame rails and body flanges onto the diffuser from the top to locate the rivet locations.


Decide how many spacers you would like to use to hold the diffuser. We provide five but three could also be used.
Evenly position the spacers on the diffuser so that the top is in the middle of the body mount flange. A little masking tape between the diffuser and the body might be needed to hold everything in place.

Make sure all of the spacers are aligned and mark around the spacers, top and bottom.

Remove the diffuser and mark the panel for 3/16” rivets on both the bottom part and the sides.
Remember that the diffuser sticks out past the body so do not mark for rivets in the area sticking out.

Drill 3/16” holes in the Diffuser for the rivets.

Drill 5/16” holes at the center of the marked spacer locations on both the body mount flange and the diffuser.
Re-position the diffuser and using the diffuser rivet holes as a guide, drill the bottom frame tubes.

Rivet the lower area. For now, you only need to put about every fourth rivet in place as the panel will be removed prior to paint. Bolt the spacers onto the body.

Use the diffuser side holes as a guide and drill the side body holes for rivets.


Final Paint Prep/ Body Shop Tips
Have the body mounting flange around the rear Diffuser painted black.

Diffuser (after license plate install)
Tools: Rivet tool, 3/16” Hex key, ½” socket and ratchet
Hardware: Secondary Body fasteners
Remount the Rear diffuser using 3/16” rivets along with the spacers and bolts.


